Foray into Frames (Part 3)
- onepaintingaday
- Feb 12, 2025
- 3 min read
Updated: Feb 14, 2025
I've been sketching a bunch, brainstorming other ideas for displaying the grid paintings and am excited about this iteration. Of the menu of framing options,
a) Frame as Plane- with holes cut for canvas
b) Frame as Linear Weave- with wood elements building up spaces for canvases (think Trellis)
c) Frame as Layered-with a wood sleeve and movable spacers
d) Frame Angled and modular
e) Frame as Armature for Tension- suspended
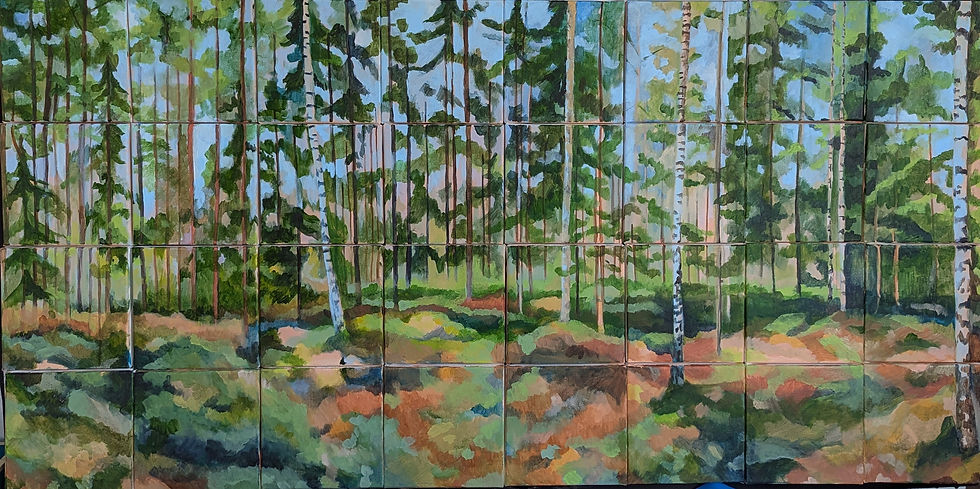
This is Exploration of framing option C. Frame as Layered Functions- with Wood Sleeves and Movable Spaces. Inspired by the current painting well underway- comprised of vertical trunks of trees of aspen, birch, norway spruce, and scotts pine, I am hoping to highlight the vertical linearity of the forest by grouping the canvases into vertical bands. The bands themselves can be moved around to expand or rearrange the order of the composition.
Taking lessons learned from the previous framing exercise- It would be helpful to have a frame which is adjustable, so that the individual pieces of art can be moved around within the frame, allowing the framing method to adjust to irregularities in the canvas sizes. (Some of these canvases are shy 1/4" to 1/2" the full 6" x 6" size).
Inspiration struck as I decided to analyze the components of a traditional frame and what their respective functions contribute to the act of framing. This thought experiment was immensely helpful in figuring out what pieces should be fixed and which pieces should be loose.
Here's how I divided and conquered:
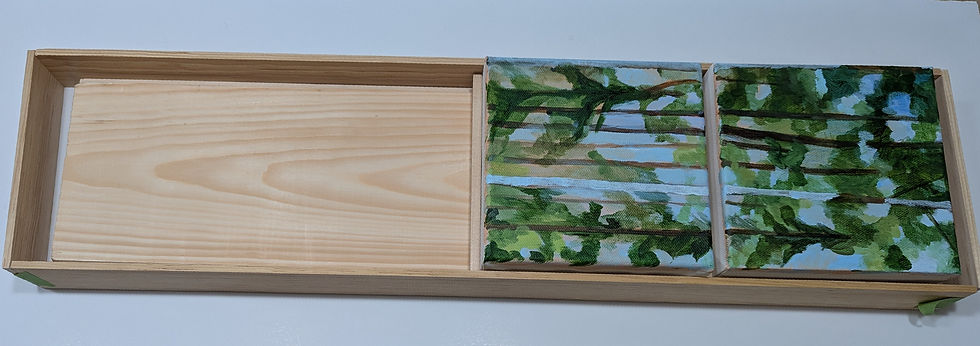
1) Structural Element: the back support. I selected precut 24" x 5.5" rough pine at Home Depot. Then added balsa side rails to widen the back support to equal the width of the canvas. Together the provide the structural element connecting the composition to the wall and the canvases.
2) Floating wood spacers: balsa wood spacers are placed between each canvas. They are fully removable allowing for alternative spacing in the future, gap management, and help unify canvases which may be slightly off dimensionally.
3. Outer wood sleeve. Thin wood edging slips around the canvas, spacers, and wood base. Taking advantage of two forces: friction and gravity it holds everything together. The sleeve rests on the wood plank and is removable allowing for ease of swapping out canvases and holds the internal pieces together.
What I learned:
1) I need to work on my brad nailer technique, but am getting better. Spent a fair amount of time pulling out brads and trying all over again.
2) Planning for tolerance and management of gaps with uneven canvas can be part of the design.
3) 4 qty corner clamps are better than 1.
4) Balsa wood is great for reinforcing the wood sleeve.
5) Bring your own measuring tape to home depot- 24" may be 27" or 22".
6) A chop saw has its limits- I could cut about 2/3 of the 5.5" width with the chopsaw.


Comments